Predation Explained: Signs, Examples, and What to Do Next
A clear, practical guide to predation: definitions, visible clues, step-by-step checks, common examples, and safe next steps for verification and reporting.
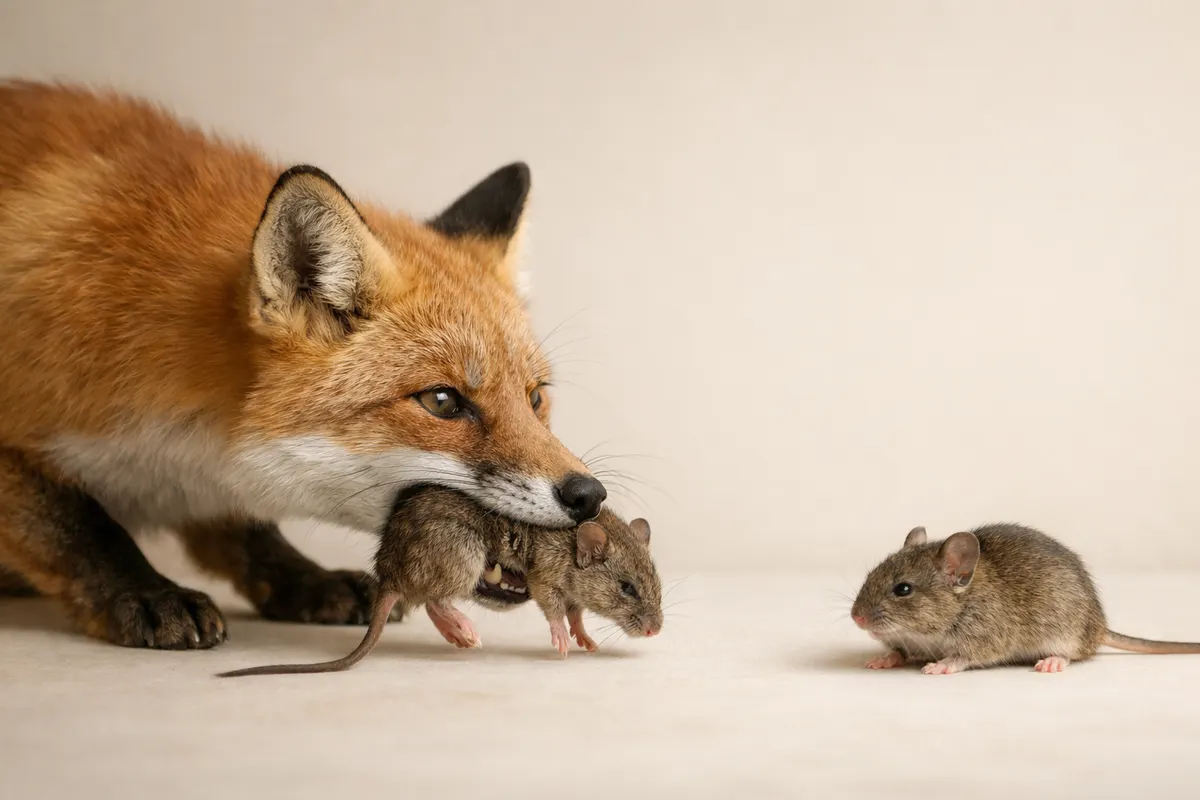
Quick answer: what predation looks like
Predation is an interaction where one organism (the predator) kills and consumes another (the prey). In the simplest terms, if you see a predator actively capturing or feeding on a living animal, that is predation. Common field examples include a hawk carrying off a pigeon, a fox with a rabbit carcass, or a spider wrapping an insect in silk to eat later.
When someone asks whether an observation shows predation, they usually want to know three things: was the prey killed by the predator rather than found dead, is the predator actively feeding, and can the evidence in a photo or from the scene support those conclusions? A single clear photo or short video of capture or feeding is strong evidence; scattered remains and no witness are much less conclusive.
As a first pass, check for fresh bite or puncture wounds, localized bleeding, intact prey parts that show clear feeding marks, and predator behavior such as carrying, tearing, or sustained feeding. Combining those visible clues with context—time, location, and species involved—gives the best short-form judgment before you pursue confirmation.
- Definition: predator kills and eats another organism.
- Strong evidence: photo/video of capture or feeding.
- Moderate evidence: fresh feeding marks, bite wounds, or predator presence.
- Weak evidence: scattered remains without a witness—could be scavenging.
What predation means in ecology and everyday observations
Ecologically, predation is a strong biological interaction that transfers energy up the food chain and shapes population sizes, behavior, and evolution. Predators exert selective pressure: prey develop defenses (camouflage, flight, group behavior) and predators evolve improved hunting tactics. In short, predation is a dynamic force that affects community structure and individual fitness.
For a field observer or photographer, predation is often a momentary snapshot of that larger process. A raptor swooping down and taking a rodent teaches you about predator-prey dynamics in that habitat; a domestic cat catching a songbird shows how human-associated predators alter local wildlife patterns. Recognizing predation in real life or photos helps you interpret ecological relationships and can guide conservation or management actions when necessary.
Not every animal death is predation. Scavenging (consuming animals already dead) and incidental deaths (traffic, disease) can leave similar-looking remains. Ecologists separate 'true predation'—immediate killing and consumption—from other interactions like parasitism, herbivory, and scavenging. Being precise matters because the implied causes, legal considerations, and follow-up actions differ.
- Predation transfers energy: predator consumes prey.
- It drives adaptations in both predator and prey.
- Different from scavenging, parasitism, and herbivory.
- Context (habitat, predator behavior) changes interpretation.
Key visual and contextual clues that indicate predation
When evaluating a photo or scene, prioritize direct evidence of a capture or feeding event. The most convincing clues are images or videos showing a predator holding, killing, or actively tearing at a prey item. Look for grasping talons, jaws clamped on a body, or a predator carrying intact prey away—these behaviors are unambiguous signs of predation.
Secondary visual clues include fresh wounds, puncture marks consistent with the predator's mouthparts or talons, localized bleeding, and consistent feeding patterns (for example, raptors often remove feathers and eat soft tissues first). Scattered feathers, fur, or bones concentrated in one spot with obvious tearing can also indicate recent predation rather than gradual decomposition.
Contextual clues strengthen visual evidence: tracks or scat nearby that match the predator species, recent disturbance (broken branches, disturbed soil), time of day that matches hunting behavior (nocturnal vs diurnal predators), and the presence of multiple predators or mobbing birds that reveal a recent kill. Conversely, insect activity, advanced decomposition, or scavenger tooth marks may favor a scavenging explanation.
- Direct capture or feeding in photo/video — strongest evidence.
- Fresh puncture wounds, bleeding, and sheared tissue.
- Predator carrying intact prey or moving it from the scene.
- Concentrated remains with tearing patterns (not gradual scavenging).
- Matching tracks, fresh scat, or mobbing/flock behavior nearby.
- Signs that decrease confidence: heavy insect activity, dispersed remains, or weathered bones.
Step-by-step checklist to evaluate a suspected predation
Step 1 — Record what you can without disturbing the scene. Take multiple photos from different angles and, when possible, a short video showing behavior. Note the time, exact location (GPS if available), and weather conditions. These baseline records help later verification and protect evidence integrity if authorities need details.
Step 2 — Describe visible wounds and behavior. In your notes or caption, record whether you saw grasping, tearing, carrying, or feeding, and whether the prey appeared alive when first observed. Specify the body parts affected (head, neck, abdomen) and any marks that look like bite or talon punctures. Clear descriptive phrases make later expert review faster and more accurate.
Step 3 — Check the immediate context for corroborating signs. Look for predator tracks, droppings containing hair or feathers, recent disturbance such as broken nests, or other animals exhibiting alarm behavior (birds mobbing a hawk, for instance). If domestic animals are present—cats or dogs—note their proximity and access to the prey.
Step 4 — Compare against common lookalikes before drawing conclusions. Scavengers like foxes or crows can leave similar remains, and human activity (traps, vehicles) can cause injuries that mimic predation. Use field guides or an initial analysis tool to match puncture patterns, feeding order, or species-typical behavior before escalating to expert contact.
Step 5 — Decide if follow-up is needed. For wildlife health concerns, injured animals, or potential illegal activity (protected species or suspected poisoning), contact local wildlife rehabilitators, conservation officers, or relevant authorities. For documentation or research purposes, submit your best photos and notes to local naturalist groups or a trusted verification tool to get expert input.
- 1. Photograph and timestamp the scene from multiple angles.
- 2. Note observed behavior and describe wounds precisely.
- 3. Search for tracks, scat, mobbing behavior, or habitat clues.
- 4. Rule out scavengers, vehicle strikes, or human-caused injuries.
- 5. Contact wildlife rehab or authorities if the animal is protected or injured.
- 6. Use a rapid verification tool for a first-pass check before formal reporting.
Practical examples: interpreting common predation scenarios
Backyard bird and cat: A common photo shows a house cat with a bird. If the cat is holding the bird and there is fresh blood or torn feathers concentrated at the head and neck, this is almost certainly predation by the cat. Context matters: a photograph of a dead bird on pavement with no cat present could be a collision rather than predation.
Raptor with prey: Images of hawks or owls carrying intact prey—often a small mammal or bird—are clear predation events. Raptors typically remove feathers and eat soft tissues first; a photo of a raptor perched with an intact rodent in its talons or mouth is strong evidence. Watch for mobbing behavior from other birds—flocks dive-bombing a raptor often indicate a fresh capture.
Spider or insect ambush: Predation at small scales (spiders, mantises) is frequently documented with close-up photos of wrapped prey or prey immobilized by silk. Look for the predator’s characteristic feeding posture, chelicerae or mandibles engaged, or prey wrapped in silk—these are direct signs of predation rather than scavenging.
Large carnivore kills: In wilderness settings, a partially consumed carcass with large bite wounds, tear marks on muscle, and nearby tracks that match a wolf, lion, or bear can indicate predation. However, scavengers quickly alter kill sites; camera-trap footage or eyewitness accounts are invaluable for confirming which species made the initial kill.
- Cat + bird: presence of cat handling and fresh tearing = predation.
- Raptor + intact prey in talons or mouth = strong evidence.
- Spider wrapping insect = direct predation confirmation.
- Large carnivore sites need tracks/camera footage to confirm original killer.
- Missing nestlings: search for torn eggshells, feather piles, or predator tracks.
Limitations
Single-image limitations: A single photograph often lacks enough context to prove predation conclusively. Images can capture a predator inspecting already dead tissue, scavengers feeding on carrion, or human-caused injuries that mimic natural predation. When the key question is whether the predator killed the prey, a time-stamped video or multiple photos over time provide much higher confidence.
Lookalikes and ambiguity: Scavengers and decomposers create marks and dispersal patterns that resemble predation. Rodents gnaw bones, insects skeletonize tissue, and weather can scatter remains. Misidentifying bite patterns or assuming feeding order (which tissues are eaten first) can lead to incorrect conclusions about the agent responsible.
Health, legal, and safety boundaries: Never handle carcasses without gloves; there are zoonotic disease risks. If you suspect illegal activity (poaching, poisoning of protected species) avoid disturbing evidence and contact authorities. For animals that might be injured but alive, trained wildlife rehabilitators or conservation officers should be consulted rather than attempting capture or treatment yourself.
Verification pathways: For high-stakes or research needs, use camera traps, repeated observations, necropsy by a qualified veterinarian or wildlife pathologist, or DNA from saliva/blood to confirm the predator species. For routine documentation, a combination of clear photos, contextual notes, and an expert review (via local naturalist groups or an initial app-based check) is an appropriate and proportionate approach.
- A single photo is often insufficient to prove predation.
- Scavenging, weather, and decomposition can mimic predation signs.
- Do not handle remains without proper protective gear.
- Contact professionals for injured animals or suspected illegal activity.
- Use repeated observations, camera traps, or necropsy for high-confidence verification.
Related guides
Next step: run a fast first-pass check with BiologyAI
After you document visible clues and follow the checklist above, use BiologyAI’s solver for a rapid first-pass analysis of your photos and notes. The tool helps you compare bite patterns, feeding order, and behavior to common predator types, so you can decide whether to seek expert verification. BiologyAI’s solver is a helpful, time-saving step before contacting wildlife rehabilitators or authorities: https://biologyai.app/tools/ai-biology-solver. Remember that app analysis is an initial check—not a substitute for professional verification in legal, health, or conservation-sensitive cases.


Frequently asked questions
How can I tell predation from scavenging in a photo?
Look for direct indicators of a kill: a predator grasping, carrying, biting, or actively tearing at the prey in the image or video. Fresh wounds, concentrated tearing around soft tissues, and predator behavior such as moving the carcass are consistent with predation. Scavenging often results in more dispersed remains, advanced insect activity, and bite marks that differ from the predator’s usual capture style. If evidence is unclear, take multiple photos over time or note nearby tracks and droppings to provide context before concluding.
Is a missing nestling always due to predation?
Not always. Nestling disappearance can result from predation, fledging earlier than expected, nest abandonment, or human interference. Signs that point to predation include torn nesting material, scattered feathers concentrated near the nest, and predator tracks or feces nearby. If you suspect predation of a protected species or repeated nest raids, document the nest with photos and contact a local bird conservation group or wildlife officer for guidance.
Should I move or remove a carcass I find?
Generally, avoid moving carcasses unless there is an immediate public health risk or authorities instruct you to do so. Moving remains can destroy evidence needed for legal or scientific investigations and exposes you to disease risk. If the carcass blocks a public trail or poses a hazard, wear gloves, photograph the scene first, document location and time, and contact local wildlife authorities for safe removal procedures.
When should I contact an expert or wildlife authority about predation?
Contact professionals if the animal is injured and needs help, you suspect illegal activity (poaching, poisoning), the incident involves a protected or endangered species, or you require definitive verification for research or legal purposes. For non-urgent documentation, a well-documented photo series with context is usually sufficient for naturalist groups or citizen-science platforms to provide feedback. Use an initial verification tool to triage evidence, then escalate to wildlife rehabilitators, conservation officers, or veterinarians when appropriate.